
This guide explains how to configure Single Sign-On (SSO) for your Springdel environment using Azure Active Directory (Azure AD). Integrating SSO helps you streamline user authentication, improve security, and simplify access management across your organization.
Key Benefits of SSO
- One set of credentials for secure access
- Simplified user onboarding and offboarding
- Centralized identity management through your existing Azure AD
- Enhanced security with multi-factor authentication (MFA) options
Before You Begin
To complete this setup, you’ll need:
- An active Azure AD tenant with admin permissions
- Access to your Springdel Admin Console
Step 1: Register Springdel in Azure AD
- Sign in to the Azure Portal with an account that has Global Administrator rights.
- Navigate to Azure Active Directory > Enterprise Applications.
- Click New Application.
- Choose Create your own application, enter a name (e.g., Springdel SSO), and select Integrate any other application you don’t find in the gallery.
- Click Create.
Step 2: Configure SAML-based SSO
- After the application is created, go to Single sign-on and select SAML.
- In the Basic SAML Configuration, click Edit and enter the following:
- Identifier (Entity ID):
https://edge.springdel.com/uis/v1/sso/saml/metadata?provider=azure&organizationid=<organization_id> - Reply URL (Assertion Consumer Service URL):
https://edge.springdel.com/uis/v1/sso/saml/?provider=azure&organizationid=<organization_id>
- Click Save once it is successfully configured.
Replace <organization_id> with your actual Springdel tenant name.
Step 3: Add User Attribute & Claim
After setting up your Basic SAML Configuration, add a custom claim:
- Under User Attributes & Claims, click Edit and then select Add new claim.
- In the Name field, enter: OrganizationId
- In the Source attribute field, enter your Organization ID value the same as Step 2; with your actual Springdel tenant name.
- Click Save once it is successfully configured.
Step 4: Download Metadata
- Under SAML Signing Certificate, download the Federation Metadata XML file.
- Copy the following items in a text file
- Login URL
- Organization ID
- Azure AD Identifier
- Application Name
- Keep this file — you will upload it in Springdel in the next step.
Step 5: Configure SSO in Springdel

- Log in to your Springdel Admin Console.
- Navigate to Settings > SSO tab.
- Fill in the details accordingly
- Login URL
- Organization ID
- Azure AD Identifier
- Application Name
- Upload the Federation Metadata XML file you downloaded from Azure AD.
- Confirm the details and save your settings.
Step 6: Assign Users in Azure AD
- In Azure AD, navigate back to your Springdel application.
- Go to Users and groups, then click Add user/group.
- Select the users or groups who should have access to Springdel via SSO.
- Click Assign.
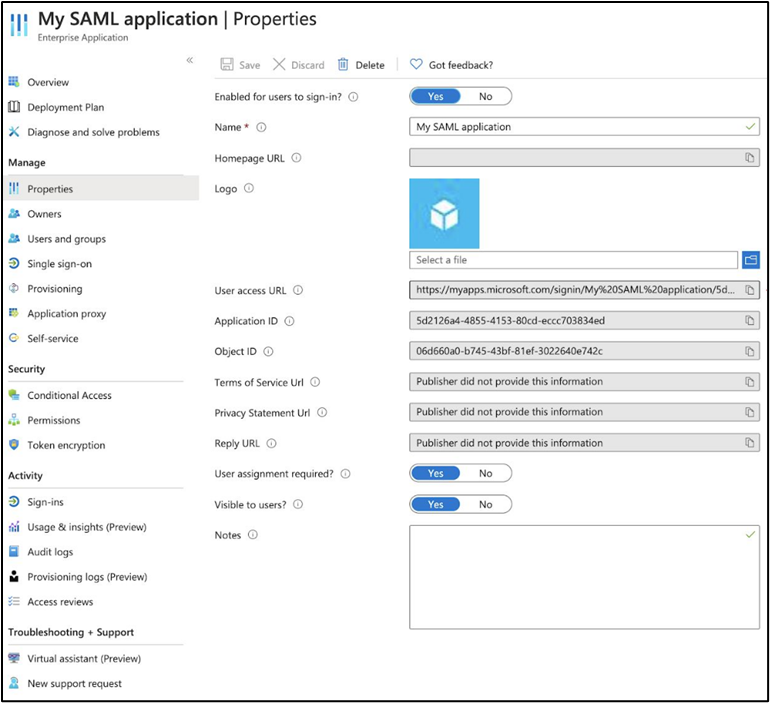
Or alternatively, you can allow any users from your Azure AD to login through your SAML application.
- In Azure AD, navigate back to your Springdel application.
- Go to Properties.
- At Assignment Required, toggle to No
- Click Save once it is successfully configured.
- This will then allow any users from your Azure AD to login through your SAML application
Step 7: Enable and test Your SSO
- In Azure AD, navigate back to your Springdel application.
- Go to Properties.
- At - Enabled for users to sign-in toggle to Yes.
- Click Save once it is successfully configured.
- Then on the Springdel login page https://edge.springdel.com, select Sign in with an SSO Provider and enter your Organization ID configured in Step 2 linked to Azure AD.
- You should be redirected to your Microsoft sign-in page to authenticate.
- If successful, you will be logged into your Springdel account.