
The Alerts feature in Springdel Edge allows administrators to monitor critical device events and conditions in real time. By configuring custom alerts, IT teams can proactively manage potential issues — such as battery drain, loss of connectivity, or unauthorized changes — before they affect operations.
Key Benefits
- Real-Time Monitoring – Receive immediate alerts for key device events.
- Proactive Management – Address issues before they escalate.
- Custom Conditions – Create rule-based triggers suited to your operational needs.
- Flexible Notification Channels – Receive alerts via email or system messages.
Step 1 - Create a New Alert

- Navigate to Alerts in the Springdel Edge Admin Console (left sidebar).
- Click Create Alert.
- Enter a descriptive name for the alert.
Example: Low Battery – Field Devices
Step 2 - Select Target Fleet
- Choose the device fleet this alert should monitor.
Example: Field Workers – Cairo
Step 3 - Select Alert Type
Choose the event type that will trigger the alert:
|
Alert Type |
Description |
|
Lost Contact |
Triggered when a device hasn't connected to Springdel for a set duration. |
|
Battery |
Triggered when battery level crosses a specified threshold (e.g., <20%). |
|
Device Profile Changed |
Triggered when the assigned device profile changes. |
|
Wi-Fi Disconnected |
Triggered upon unexpected disconnection from Wi-Fi. |
|
Device Powered On |
Notifies when a powered-off device is turned on. |
|
Device Factory Reset |
Triggered when a device is reset to factory settings. |
|
Bluetooth Status Changed |
Notifies when Bluetooth is turned on/off. |
|
Device Enrolled |
Alerts when a new device is enrolled in Springdel. |
Step 4 - Define Alert Condition
Specify the condition that triggers the alert.
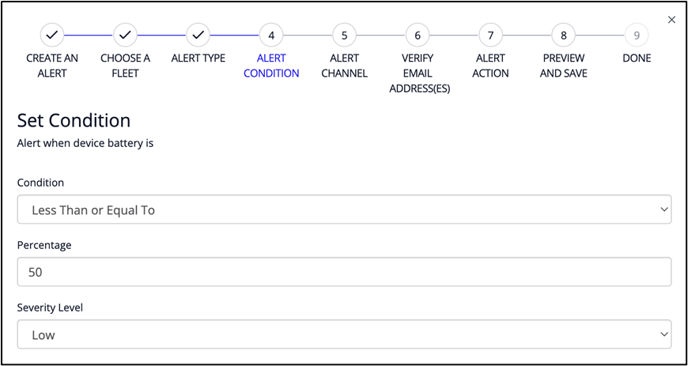
Example: Battery Alert
- Condition: Battery level is below 20%.
- Parameters: Less than.
Example: Lost Contact
- Condition: Device offline for more than 30 minutes.
- Parameter: Duration (e.g., 30 minutes).
Step 5 - Configure Alert Delivery Channel

Notification Options:
- Email – Send alerts to one or more email addresses.
Email Settings:
- Frequency:
- Immediately – Sent as soon as triggered
- Daily/Weekly – Delivered as summaries
- Time of Delivery: Define delivery time (e.g., 9:00 AM)
- Time Zone: Follows your tenant’s configured time zone
Step 6 - Set Recipient(s)
- Add one or more verified email addresses.
Example: support@company.com
Step 7 - Select Optional Alert Action
|
Action |
Description |
|
No Action |
No automated response. Informational only. |
|
Remote Reboot Device |
Device automatically reboots when the alert is triggered. |
|
Switch Profile |
Changes the device to a predefined configuration profile. |
|
Send Message to Device |
Displays a custom message on the device screen. |
Step 8 - Review & Save
- Review the alert configuration details.
- Confirm all selections.
- Click Save to activate the alert.
Step 9 - Manage Alerts
- Your alert is now live.
- You can manage, edit, or delete alerts anytime under the Alerts tab.
Best Practices & Tips
- Use Clear Naming: Name alerts descriptively (e.g., Offline >10min – Retail Devices).
- Reduce Noise: Avoid overly sensitive alerts to prevent alert fatigue.
- Test Before Production: Test alerts in a non-critical environment first.
- Fleet-Level Segmentation: Group alerts by fleet for streamlined troubleshooting.
- Periodic Review: Regularly revisit alert rules to keep them aligned with operational changes.