
How Springmatic Core can be installed to help enroll an Android device without Google Services
Google provides its version of Android that most OEMs use around the world and certify within the Google standards and framework. This is a Google Managed Services (GMS) device. However, certain devices in particular regions, or devices that leverage Android merely as a base platform to run a finite set of services/applications may not have the full GMS compatibility or certification.
Springdel supports these devices as well!
Similar to the GMS enrollment steps, create a fleet, profile, and enrollment in the Springmatic platform.
On the device, go to 'Settings' -> 'About Device' -> Click 8 times on the 'Build Number' to enable developer options.
Some devices will then show developer options in the 'Settings' menu, some will be under 'Settings' -> 'System' -> 'Advanced'.

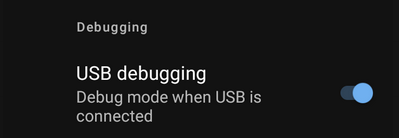
Click the 'Developer options' and enable 'USB Debugging'
Connect the non-GMS device to a USB with a computer that has the Android Device Bridge (ADB) tools installed.
For more information on how to get these tools, please check your computer/workstation's package manager or visit this page to understand more about the install process.
In the terminal / command line run the below to ensure device connectivity is working.
~$adb devices
The command should invoke a request to the connected device to allow USB debugging. Click 'Allow' on the device when prompted.
Download the Springmatic DPC package for Android from this location.
Linux + macOS + WSL
The command line (terminal) can be used to help run adb commands and scripts. To create the provisioning script copy the below syntax into a text editor of choice.
#!/bin/bash

adb install springdelDPC.apk
adb shell dpm set-device-owner com.springdel.android.dpc/.DeviceAdminReceiver
adb shell am start -n com.springdel.android.dpc/.MainActivity
Save the above file as springdelenrollment.sh. Other file names are possible, just remember the name given to the script file.
Running the above script depends on the operating system.
Windows does not natively support running scripts, however users can install the Windows Subsystem for Linux (WSL) to support. Click for more information on how to install WSL.
From the same directory of the script and the Springmatic DPC, open a terminal and run the following:
chmod +x springdelenrollment.sh
Now run:
./springdelenrollment.sh
This should provision the enrollment DPC application to the device and allow it to enroll on the Springmatic platform.
Open the Springmatic Core application from the app draw on the device. ![]()
From the application, type or scan the appropriate Enrollment ID to begin device enrollment.

Windows without WSL
Windows can install and run ADB tools without WSL setup. However, it cannot run the above commands as a script. Instead run the commands in the command prompt in order individually.
On a Windows 7,8,10, or 11 system ensure that the ADB tools are installed.
Click the Windows start button and type 'cmd' and press enter.
Similar to other platforms, ensure devices are connected by running the below command:
adb devices
If prompted on the device, click 'Allow' to ensure the Windows system has permission to access the device.
Navigate to the same directory of the Springmatic DPC application (.apk) file.
Proceed to enter the next three commands one at a time.
adb install springdelDPC.apk
adb shell dpm set-device-owner com.springdel.android.dpc/.DeviceAdminReceiver
adb shell am start -n com.springdel.android.dpc/.MainActivity
Similar to other platforms, open the Springmatic Core application and enroll by entering or scanning the QR code of the enrollment ID.
Once the Springmatic Core application is installed on the device successfully there is no further need to have USB debugging or developer options enabled. For security reasons, Springdel recommends disabling USB debugging and and developer options after enrollment.
Enrollment Video using Windows
Enrollment Video using macOS